Table of Contents
Stick welding, also known as shielded metal arc welding (SMAW), is one of the most versatile and widely used welding processes. It involves using an electric current to form an arc between a consumable electrode coated in flux and the base metal. The arc generates enough heat to melt the electrode and base metal, allowing them to mix and form a weld pool. As the weld pool cools, it forms a strong metallurgical bond.
Mastering stick welding takes time and practice. However, having the right techniques and knowledge can help beginners learn faster and achieve high-quality welds. This comprehensive guide provides stick welding tips and tricks, tailored for welding newbies.
What is Stick Welding?
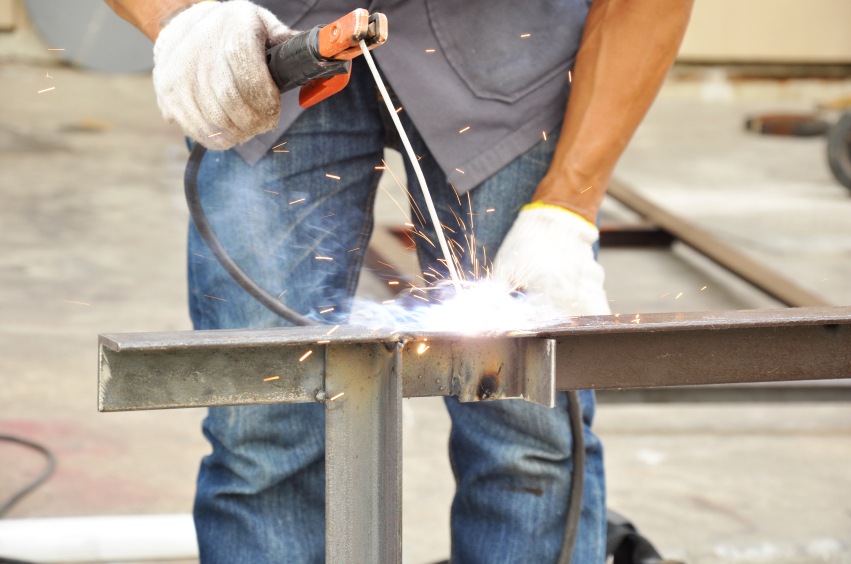
Stick welding is a manual welding process. The welder must maintain a short arc length between the electrode and the workpiece. The arc generates temperatures up to 6500°F, melting the metals to form a weld pool.
The flux coating on the electrode provides gas shielding to protect the weld pool from atmospheric contamination as it solidifies. This gives stick welding its versatility, allowing it to be used outdoors and in windy conditions.
Stick welding only requires a welding machine, electrodes, and personal protective equipment. This makes it highly portable for repair work and construction sites. It can weld thick sections, all positions, and dirty/rusty metals.
For these reasons, stick welding remains popular for industrial fabrication, construction, maintenance, and repair applications.
Benefits of Stick Welding
Here are some of the main advantages of the stick welding process:
- Portability – The equipment is small, compact, and highly mobile for site work.
- Versatility – It can weld thick and thin metals, joints, and various positions.
- Electrode flexibility – A wide range of electrodes are available to suit different metals, joint types, and welding positions.
- Deep penetration – The process can penetrate thicker sections in a single pass.
- All-position welding – Stick welding can weld flat, horizontal, vertical, and overhead.
- Minimal edge preparation – Only basic joint preparation is required for many welds.
- Weld quality – Stick welding produces high-quality, strong welds when performed correctly.
- Low cost – The equipment and consumables are inexpensive compared to other processes like TIG or MIG welding.
Essential Stick Welding Equipment
Stick welding does not require extensive equipment. Here is the fundamental gear needed:
Welding Machine
The welding machine, also called a welder, provides the electrical power for stick welding. Look for:
- Amperage range – Match the machine’s output capacity to the electrodes and material thickness you’ll be welding. 110V welders can go up to 180 amps. Larger 220V/230V units provide 200-400+ amps.
- Duty cycle rating – This indicates the percentage of time the welder can operate at max power before overheating. Aim for a 60% duty cycle or higher for continuous welding.
- AC, DC, or AC/DC – Choose AC for general-purpose welding or DC for easier arc starts and deeper penetration. Combo AC/DC welders offer the benefits of both currents.
Electrodes
Electrodes consist of a metal core wire coated in flux. Common types include:
- 6010/6011 – Deep penetrating electrodes for outdoor use, dirty/rusty metals, and difficult positions. Better for AC.
- 6013 – Easy to use, all-position electrode good for sheet metal up to 3/16 inch thick. Runs well on AC or DC.
- 7018 – Versatile, all-purpose electrode that works on AC or DC. Good for structural steels. Provides smooth arc action and easily removes slag.
- 7024 – A low hydrogen electrode for welding higher-strength steels prone to cracking. Use with DC.
Match the electrode size (diameter) and type to your base metal, joint design, and welding position.
Safety Gear
Stick welding requires minimal safety equipment:
- Welding helmet – Protects the eyes and face from the intense ultraviolet and infrared rays of the arc. Look for adjustable sensitivity and a clear viewing lens.
- Welding gloves – Heavy-duty gloves prevent burns from hot metal and sparks. Leather, cowhide, and fire-resistant synthetic materials work well.
- Work clothes – Wear non-flammable clothing like jeans and a cotton shirt. Avoid synthetics that can melt. Use leather jackets and aprons for added protection.
- Work boots – Leather boots prevent hot sparks from entering and burning feet.
- Respirator – A respirator with particulate filters is essential for filtering out welding fumes laden with manganese and other toxic particles.
Proper protective gear is a must to prevent painful burns and long-term health issues when stick welding.
How to Set Up a Stick Welder
Follow these steps to set up your stick welding equipment for operation:
- Select an electrode – Choose an electrode type and diameter suited for your base metal and joint design. Consult AWS classification charts for guidance.
- Adjust amperage – Set the welding machine amperage within the range printed on the electrode packaging. Thicker electrodes and metals need more current.
- Configure polarity – Use DC electrode negative (DCEN) for deep penetration. AC or DC electrode positive (DCEP) allows faster travel speeds.
- Secure cables – Ensure all welding cables and connections are tight. Loose connections can impede current flow.
- Clamp workpiece – Clamp or tack weld the joint pieces to a welding table or other sturdy base to prevent movement during welding.
- Clear area – Remove all flammable materials from the welding zone. Have a fire extinguisher nearby.
- Wear PPE – Don proper protective clothing, gloves, boots, helmet, and respirator.
- Ready electrode – Select an electrode, remove the flux coating at the tip, and insert it into the electrode holder.
The machine is now set up and ready to weld!
How to Strike and Maintain an Arc
Starting and holding the arc are critical skills for quality stick welding. Follow these tips:
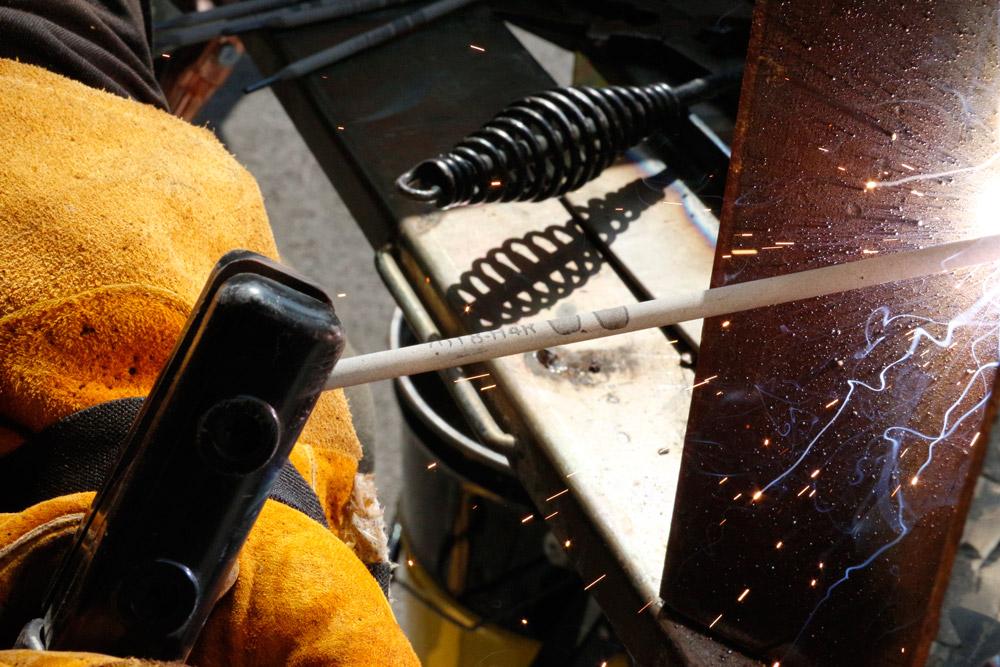
- Scratch start – Lightly drag the electrode tip across the metal like striking a match. This gives positive arc starts.
- Quick breaks – Pull the electrode away about 1/4 inch away once the arc initiates to avoid sticking.
- Correct angle – Point the electrode downward along the joint at a 15-30-degree push angle. This directs heat into the joint.
- Steady hands – Hold the stinger firmly but not rigidly. Keep hands steady since they form part of the weld circuit.
- Constant arc length – Maintain a consistent 1/8-inch arc gap as the electrode burns down. Adjust your position to keep this length.
It takes practice to master starting and holding the arc consistently. But mastering arc control is the number one skill all expert stick welders possess.
Stick Welding Tips and Tricks For Beginners
Use these fundamental techniques to create high-quality welds:
1. Clean Joints
Remove all dirt, paint, oil, and grease from the joint area to prevent weld defects. Wire brushing, grinding, or sandblasting cleans most metals for welding.
2. Optimal Travel Speed
Move the electrode steadily along the joint at a speed that gives good penetration without undercutting the base metal. Travel speed
depends on many factors like electrode type, amperage, and joint position. In general:
- 3-5 inches per minute for thin materials
- 2-3 inches per minute for thick sections
Go slower on vertical and overhead welds. Gauge penetration on the first weld pass then adjust speed.
3. Proper Weaving Technique
Use a weaving technique to ensure proper fusion between weld passes and to fill a joint. Common patterns include:
- Circular – Best for filling wide grooves efficiently. Makes uniform weld beads.
- Figure 8 – Works well on butt and T-joints. Widens and evens the weld.
- Whip – Quick side-to-side motion to improve tie-in. It’s good for vertical-up welding.
Always pause briefly at each edge of the weave pattern. The timing will come with practice.
4. Multiple Weld Passes
For thick metal, deep grooves, and large joint gaps, make multiple passes to fill. Each new pass should overlap the previous by about 50% for good fusion. Allow passes to cool between layers.
5. Backing Strips
On heavy single-pass welds, use copper or ceramic backing strips to support molten weld metal. This prevents burn-through and helps with penetration.
6. Peening
Peen each weld pass while still hot with a chipping hammer and wire brush. This relieves stress and removes slag for an optimal surface for the next pass.
Common Stick Welding Problems and Solutions
Stick welding has a steep learning curve. Here are solutions to common beginner errors:
Porosity
Gas pockets trapped in welds. The cause is damp electrodes or poor gas shielding. Use dry electrodes and maintain a tight arc.
Incomplete fusion
Not fully bond with the base metal. Increase current or reduce travel speed for better penetration.
Undercut
Grooves melted into the base metal. Reduce current, travel faster, or use more weaving action.
Spatter
Sparks and metal droplets around the weld. Indicates an arc that’s too long. Get closer to the workpiece.
Excessive slag
Thick slag that’s hard to remove. Use an electrode designed for easy slag detachment.
Cracking
Cracks in the solidified weld metal. Can result from impurities or rapid cooling. Use low-hydrogen electrodes and preheat thick stock.
Burn through
Melting completely through the joint. Decrease amperage or increase travel speed to prevent burn-through on thin stock.
Mastering stick welding comes down to controlling the arc and heat input. Dialing in the right amperage, travel speed, angle, and electrode manipulation will eliminate most flaws.
Advanced Stick Welding Tips and Tricks
Once you’ve mastered the basics, try these more advanced stick welding techniques:
- Multi-pass welds – Make multiple passes on thick sections and deep grooves. Each pass should overlap by 50%.
- Weave patterns – Learn concentric circles, crisscrosss, and triangular patterns to make solid welds.
- Backing strips – Use copper or ceramic bars under the weld zone on single-pass welds.
- Fillet welds – Make T fillet and lap joint fillets using stringer beads and weaving.
- Gouging – Use special electrodes to remove metal, like defective welds or corroded sections.
- Brazing – Fuse metals without melting using bronze filler rods. Useful for joining dissimilar metals.
- Arc gouging – Melt then air blast away metal. Used to cut or groove metals in welding preparation.
- Arc stud welding – Weld metal studs to structures like buildings, bridges, and vehicles for fastening, grounding, and more.
- Aluminum welding – Use special aluminum electrodes and machines tuned for stick welding aluminum alloys.
- Underwater welding – Waterproof electrodes allow stick welding repairs underwater. Useful for marine applications.
- Pipe welding – Master downhill root passes on pipe and out-of-position fills and caps.
- Exotic alloys – Special electrodes permit welding stainless steels, chrome-moly, nickel alloys, and other metals.
Learning these techniques expands your welding knowledge and helps make you an expert stick welder able to handle complex fabrication and repair jobs.
Stick Welding Safety Tips
Stick welding comes with hazards like electric shock, fumes, burns, and ultraviolet radiation. Follow these precautions:
- Wear head-to-toe protective gear when welding
- Work in a well-ventilated area or use local exhaust
- Secure workpieces to avoid contact with the arc
- Keep electrodes dry and inspect welding equipment for damage
- Never touch the electrode while energized
- Avoid touching hot metals right after welding
- Learn proper procedures for electrical, fire, and other welding hazards
- Keep a fire extinguisher and first aid kit accessible
Make safety the top priority. Your health is not worth sacrificing for the sake of faster welding!
Final Words
With the right techniques and practice, even beginners can become skilled at stick welding. Start by understanding the basics of stick welding. Choose quality equipment tailored to your applications. Focus on mastering arc starting, electrode angles, and travel speed. Learn from your mistakes and refer back to this guide to correct flaws.
Stick with it through the initial learning phase. Your skills will grow with experience. Before long, you’ll be creating structurally sound, quality welds with ease. Mastering sticks opens the doors to an extremely useful metalworking process with countless fabrication uses.